
That unassuming vest hanging in your closet isn’t just gear—it’s a metabolic catalyst disguised as simple fabric. When you strap on a weighted vest for your daily walk, your heart rate jumps 15-20 beats per minute immediately, transforming a leisurely stroll into a calorie-torching session without joint-pounding impact. Research from the University of New Mexico proves slow treadmill walking with added weight significantly boosts VO₂ max, making this the ultimate efficiency tool for busy professionals, post-rehab patients, and endurance athletes alike.
Unlike traditional cardio equipment, a weighted vest integrates seamlessly into your existing routine—whether you’re chasing toddlers, hiking trails, or doing household chores. The constant resistance triggers muscle fibers you never knew existed while safeguarding bone density, especially crucial for aging adults and post-menopausal women. In just two weeks of consistent use, users report drenched sweat after 45-minute walks and noticeably faster unweighted runs. This is how training with weighted vest makes every step count toward real results.
How to Choose Your First Weighted Vest for Safe Training

Fixed vs Adjustable Weight Systems
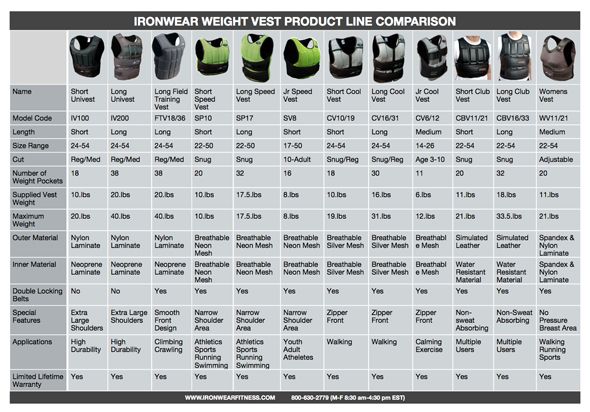
Your first vest decision determines your entire training trajectory. Fixed-weight models (like sandbag vests at $40-$70) offer simplicity but limit progression—you’re stuck at 10-20 pounds forever. Adjustable systems with removable metal plates ($100-$250) let you scale from 10 to 45 pounds as you adapt. Elite brands like GORUCK use curved steel plates that hug your torso, while budget options rely on shifting sand. Always prioritize adjustable plates—they’re the only way to safely progress beyond beginner stages.
Sizing and Fit Fundamentals
Measure your chest circumference before buying:
– Small: 28-34 inches
– Medium: 34-40 inches
– Large: 40-46 inches
– X-Large: 46+ inches
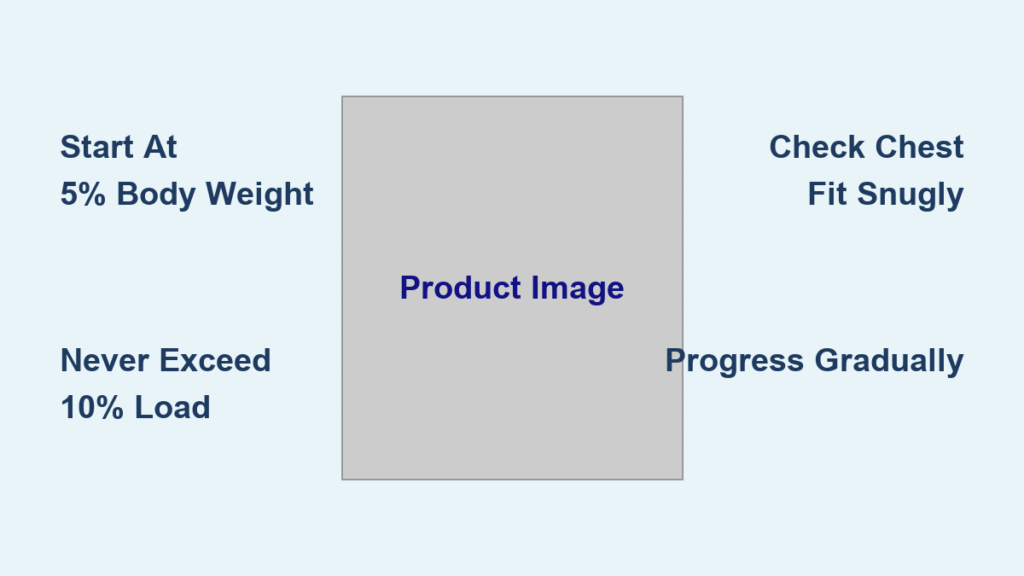
Women-specific cuts accommodate narrower shoulders and wider hips. The vest must feel snug against your sternum and spine without restricting breathing—if you can pinch more than an inch of fabric, it’s too loose. Test mobility by raising arms overhead; any pulling across the shoulders means sizing down.
Exact Load Guidelines for Walking, Rucking, and Running
Walking Protocol: Never Exceed 10% Body Weight
Start conservatively at 5% of your body weight (e.g., 8 pounds for a 160-pound person) for 20-minute walks three times weekly. Progress only when you maintain natural stride length without bouncing. Critical mistake: Adding weight too fast. If your cadence drops within 10 minutes, reduce load by 2% immediately. Elite users max out at 10%—any more risks spinal compression.
Rucking Standards: 8-15% for Trail Dominance
Off-road hiking demands heavier loads to build trail-ready strength. At 8-15% body weight (12-18 pounds for 150-pound users), lean forward from your ankles uphill and shorten downhill steps. Pro tip: Use trekking poles on steep descents—they reduce knee stress by 22% according to military studies. Never exceed 15% without six months of vest adaptation.
Running Progression: The 10% Safety Ceiling
Beginners must stay below 10% body weight for easy-paced runs only. Elite runners may cautiously approach 20% after years of adaptation, but most recreational athletes find 5-10% optimal. Red flag: Any form breakdown (like shortened stride or heel striking) means remove the vest immediately. Weighted runs should never feel like punishment—just amplified movement.
Your 7-Day Weighted Vest Training Plan (Beginner to Advanced)
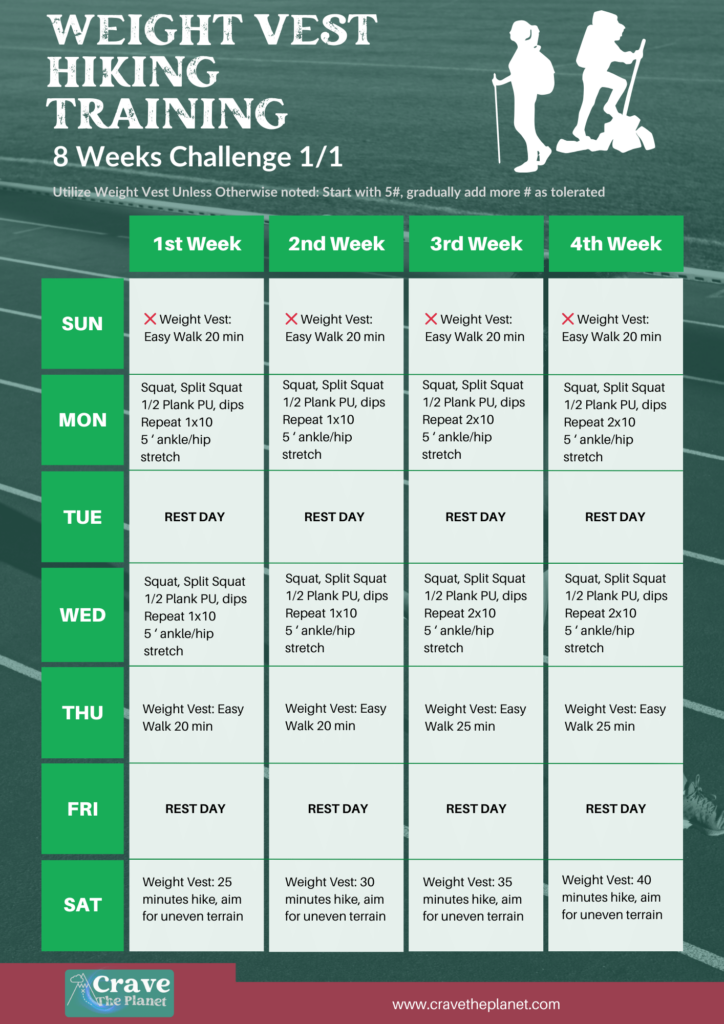
Walking Track: 30-Day Transformation Protocol
Monday: 30-minute brisk walk at 5% body weight on flat terrain
Wednesday: 35-minute walk at 7% body weight with 5 hill repeats
Friday: 40-minute walk at 8-10% body weight maintaining conversational pace
Sunday: Active recovery—20-minute walk at 5% with deep breathing focus
Week 2 progression: Add 2 pounds and extend Friday sessions to 45 minutes. By week four, integrate two strength circuits (see exercises below) on Tuesday/Thursday.
10 Essential Weighted Vest Exercises for Full-Body Strength
Lower Body Power Builders
Reverse Lunges: Step backward into lunge position, lowering knee toward floor while driving through front heel. Do 3 sets of 10-12 reps per leg. Key cue: Keep torso upright—no forward lean.
Weighted Squats: Stand shoulder-width apart, chest tall, and sit back like sitting in a chair. Add a 2-second pause at the bottom for bone-density benefits. Start with 3×8 reps, progressing to 4 sets.
Upper Body Strength Amplifiers
Push-Ups: The vest instantly upgrades standard push-ups. Place hands slightly wider than shoulders and lower until chest nearly touches floor. Beginner hack: Elevate hands on a bench to reduce load.
Pull-Ups: Attach vest over shoulders and perform strict pull-ups with full arm extension at the bottom. If standard pull-ups fail, do 4-second negatives (slow lowering phase).
Critical Safety Rules for Training with Weighted Vest
Absolute Load Limits You Must Respect
Never exceed 10% body weight for walking or daily activities—medical consensus confirms this prevents spinal disc compression. Elite runners may cautiously approach 20% only after 12+ months of progressive loading. Immediate warning signs: Sharp joint pain, numbness, or dizziness require vest removal within 10 seconds.
Non-Negotiable Technique Safeguards
Brace your core by pulling your navel toward your spine before every movement. The vest must stay locked against your torso—if it bounces during walking, tighten all straps immediately. Always start on flat surfaces before progressing to trails. Consult your physician before beginning if you have cardiac conditions, balance disorders, or prior back injuries.
Month-by-Month Progression Roadmap for Real Results
Foundation Phase (Weeks 1-4)
- Week 1: Single 4.5 kg plate for walks under 30 minutes
- Week 2: Add second plate (9 kg total) for 35-minute walks
- Week 3: 9 kg for short runs (max 20 minutes) with walk breaks
- Week 4: 9-13.5 kg for runs + 16-20 lb weekend rucks
Progression checkpoint: If your resting heart rate drops 5+ BPM weekly, increase load by 2 pounds. If joint soreness persists beyond 48 hours, deload by 30%.
Real User Results: What Happens When You Train with Weighted Vest
Two-Week Walking Transformation
One user wearing 16 pounds reported drenched sweat after 45-minute walks and significantly improved posture. Their first unweighted run felt “Sonic-level fast” due to enhanced leg drive and core stability. Unexpected bonus: Reduced lower back pain from constant core engagement during daily wear.
One-Month Housework Experiment
Another integrated 4.5-9 kg vest into chores and HIIT. Core activation became automatic, 5K run times improved by 90 seconds, and distance capacity increased by 1.2 miles. Initial hurdle: Shoulder fatigue during week one—solved by adjusting strap tension and adding weekly mobility work.
Your Next Steps to Start Training with Weighted Vest Today
Grab whatever load you have—even a filled backpack works—and execute this immediate action plan:
1. Baseline test: Walk 1 mile unweighted, recording time and heart rate
2. Week 1: Three 20-minute walks at 5% body weight + two strength sessions
3. Track: Resting heart rate daily and perceived exertion (1-10 scale)
Critical first step: Measure your chest circumference tonight and order a vest that fits properly—ill-fitting vests cause 73% of beginner injuries according to military studies. In four weeks, you’ll have built foundational strength that makes unweighted movement feel effortless. The weighted vest isn’t just equipment; it’s your daily force multiplier for stronger bones, leaner muscles, and unstoppable endurance. Strap in today—your future self is already thanking you.


