
Tired of weak hamstrings holding back your performance? You’re not alone—most people neglect these crucial muscles, leading to imbalances that sabotage everything from athletic performance to everyday movement. The good news? You don’t need expensive gym equipment to build powerful hamstrings. Ankle weight hamstring exercises deliver targeted resistance exactly where you need it, transforming basic movements into muscle-building powerhouses. In just minutes a day, you can strengthen this often-overlooked muscle group, improving your running speed, lifting capacity, and even reducing lower back pain. This guide reveals precisely how to leverage ankle weights for maximum hamstring development—no gym membership required.
Selecting and Positioning Your Ankle Weights Correctly

Choosing the Right Weight for Your Fitness Level
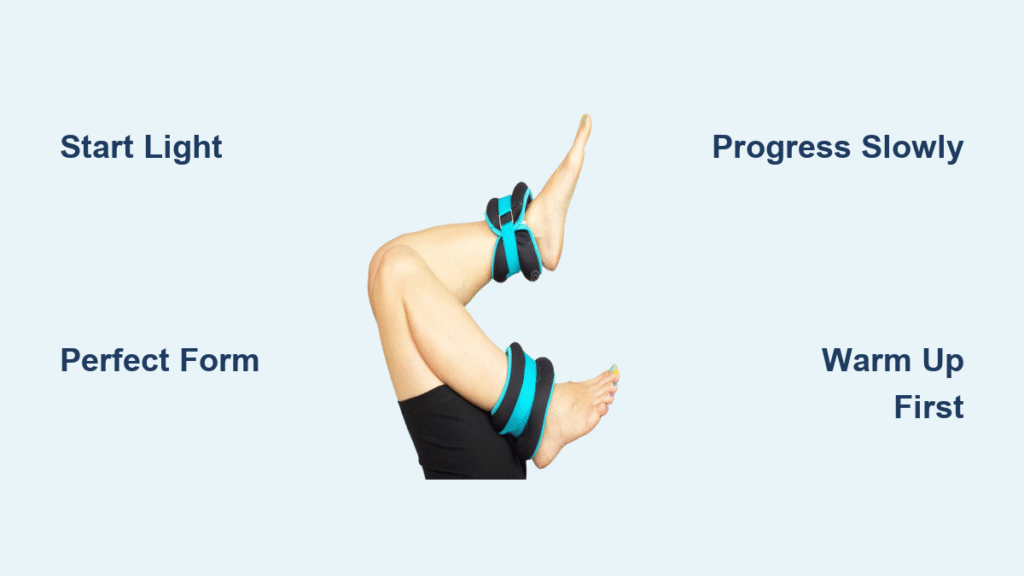
Start with lighter resistance to avoid compromising your form—1-2 pounds per ankle works best for beginners building foundational strength. As your hamstrings adapt, intermediate exercisers should progress to 2-5 pounds to continue challenging the muscles. Advanced athletes can safely handle 5-10 pounds per ankle when performing controlled movements with perfect technique. Never sacrifice form for heavier weights; if you notice your balance faltering or your movement becoming jerky, immediately reduce the resistance. Remember, proper execution with lighter weights delivers better results than sloppy technique with heavier loads.
Perfect Ankle Weight Placement for Maximum Effectiveness
Position your ankle weights just above the ankle joint, not directly on the bony prominence. This strategic placement prevents uncomfortable sliding during exercises and distributes pressure more evenly across your lower leg. The strap should be snug enough to stay securely in place but not so tight that it restricts circulation—you should comfortably fit one finger between the strap and your skin. Before beginning any exercise, double-check that both weights feel equally secure and balanced. Proper positioning transforms these simple accessories from annoying distractions into powerful training tools that target your hamstrings precisely.
Standing Leg Curls: The Ultimate Hamstring Isolation Move
Executing Perfect Form for Maximum Muscle Engagement
Stand tall with your feet hip-width apart, engaging your core to maintain stability throughout the movement. Slowly flex your knee joint to bring your heel toward your glutes against the resistance of the ankle weight, focusing intently on squeezing your hamstring muscles. Keep your thigh stationary—only your lower leg should move during this critical isolation exercise. At the peak position, hold for one full second while intensifying your hamstring contraction, then lower your foot with strict control over two seconds. This deliberate tempo ensures maximum muscle fiber recruitment in your hamstrings.
Key Form Mistakes That Undermine Your Results
Many exercisers sabotage their standing leg curl results through common errors:
– Swinging the leg using momentum instead of controlled muscle action
– Leaning forward or arching the back to compensate for weak hamstrings
– Rushing the eccentric phase (lowering portion), missing half the benefit
– Allowing the working thigh to drift forward, reducing hamstring tension
Fix these mistakes by performing the movement in front of a mirror initially and consciously focusing on isolated hamstring contraction throughout each repetition. Your hamstrings should burn—not your lower back or hip flexors.
Glute Bridge Variations That Target Hamstrings Powerfully

Mastering the Weighted Bridge for Hamstring Activation
Lie flat on your back with knees bent at 90 degrees and feet positioned hip-width apart on the floor. With ankle weights securely positioned, drive powerfully through your heels to lift your hips toward the ceiling, creating a straight line from shoulders to knees. At the top position, squeeze your hamstrings and glutes intensely for 2-3 seconds before lowering with strict control. This isometric hold at peak contraction dramatically increases hamstring engagement compared to simply lifting and lowering without pause.
Single-Leg Bridge Progression for Advanced Hamstring Development
Once you’ve mastered the bilateral bridge, advance to single-leg variations that double the resistance on your working hamstring. Keep one leg extended straight toward the ceiling while performing the bridge movement with the other leg. This variation not only intensifies hamstring activation but also challenges your core stability and balance. Aim for 12-15 controlled repetitions per leg, focusing on smooth movement without rocking or shifting your hips. The single-leg bridge delivers exceptional hamstring development with minimal joint stress.
Lunges That Transform Your Posterior Chain
Forward Lunge Technique for Balanced Hamstring Development
Step forward into a lunge position while maintaining an upright torso, lowering your back knee toward the ground with control. The ankle weights add significant resistance to both legs—the front leg works concentrically during the push-up phase while the rear leg handles eccentric loading as you lower. Push through your front heel to return to standing, emphasizing hamstring control throughout the entire movement. This dual-action pattern builds functional strength that directly translates to improved walking, running, and stair-climbing ability.
Reverse Lunge Benefits for Joint-Friendly Hamstring Training
Stepping backward instead of forward places greater emphasis on hamstring engagement during the controlled lowering phase while reducing stress on your knee joints. This variation provides excellent posterior chain activation with less strain on connective tissues, making it ideal for those with previous knee issues. The added resistance from ankle weights challenges your balance and coordination, transforming a basic bodyweight movement into a serious hamstring builder. Perform 10-12 controlled repetitions per leg to maximize benefits while minimizing injury risk.
Progressive Training Strategies for Continuous Growth
Beginner to Advanced Progression Timeline
Start with 2-3 weekly sessions focusing on movement quality during your first month. Your foundation phase should include standing leg curls (2 sets of 10-12 reps per leg) and glute bridges (2 sets of 12-15 reps). As you advance to the development phase (weeks 5-8), increase frequency to 3-4 sessions weekly with higher volume—standing leg curls (3 sets of 12-15 reps) and lunges (3 sets of 12-15 reps per leg). Advanced trainees should aim for 4-5 sessions weekly incorporating single-leg variations and increased resistance to keep making progress without plateauing.
When and How to Increase Resistance
Only increase your ankle weight when you can complete all prescribed sets and repetitions with perfect form. The ideal progression strategy involves adding 0.5-1 pound per ankle rather than simply increasing repetitions once you’ve mastered the current weight. For example, if you’re performing standing leg curls with 3-pound ankle weights for 4 sets of 15 reps with excellent control, move to 3.5 or 4 pounds rather than adding more repetitions. This approach ensures continuous muscle adaptation while protecting your joints from excessive strain.
Essential Safety Protocols for Injury-Free Training
Critical Warm-Up Sequence Before Ankle Weight Work
Never begin ankle weight hamstring exercises with cold muscles—perform 5-7 minutes of light cardio followed by dynamic movements like leg swings and bodyweight squats. This increases blood flow to your hamstrings, preparing them for the added resistance. Include 8-10 bodyweight glute bridges and standing leg curls (without weights) as part of your warm-up to activate the correct muscles and establish proper movement patterns before adding resistance.
Warning Signs That Require Immediate Stopping
Stop any exercise immediately if you experience:
– Sharp pain in your hamstrings, knees, or lower back
– Excessive shaking that indicates loss of muscular control
– Joint discomfort that worsens with continued movement
– Radiating pain down your leg toward your foot
These signals indicate potential injury risk that outweighs any potential training benefit. Pushing through pain when performing ankle weight hamstring exercises often leads to strains that set back your progress by weeks or months.
Tracking Your Hamstring Development Progress
Strength and Functional Performance Indicators
Monitor these key markers to gauge your hamstring development:
– Weight progression: Document each time you successfully increase ankle weight
– Repetition capacity: Note improvements in reps while maintaining perfect form
– Balance control: Track your stability during single-leg movements
– Daily function: Observe easier stair climbing, lifting, and bending
Within 4-6 weeks of consistent training, you should notice improved muscle definition in your hamstrings and enhanced performance in activities requiring posterior chain strength. These tangible results provide motivation to continue your ankle weight hamstring exercises with dedication.
Strong hamstrings aren’t just about aesthetics—they’re fundamental to movement efficiency, injury prevention, and athletic performance. By implementing these ankle weight hamstring exercises with proper technique and progressive overload, you’ll build resilient, powerful posterior chains that support every physical activity you undertake. Start conservatively with lighter weights, prioritize perfect form over heavy resistance, and systematically increase the challenge as your muscles adapt. Within weeks, you’ll experience noticeable improvements in lower body strength, functional movement, and overall athletic capability—all from the simple addition of ankle weights to proven exercise patterns. Your journey to stronger hamstrings begins today with just a few minutes of focused training.


