
Running with extra resistance builds serious strength and burns more calories, but commercial weighted vests often cost $150+ for basic models. Learning how to make a weighted vest for running puts you in control of the fit, weight distribution, and budget—crafting a professional-quality vest for under $75 that actually stays put during your runs. Whether you’re training for tactical fitness tests or simply want to maximize your running efficiency, these three DIY methods solve the #1 problem with store-bought vests: annoying bounce that throws off your form.
Forget ill-fitting vests that ride up or shift during your stride. These approaches specifically address running’s unique demands: zero vertical movement, balanced weight distribution, and unrestricted breathing. You’ll create a vest that moves with your body, not against it—let’s get started.
Tactical Plate Carrier Conversion for Zero Bounce
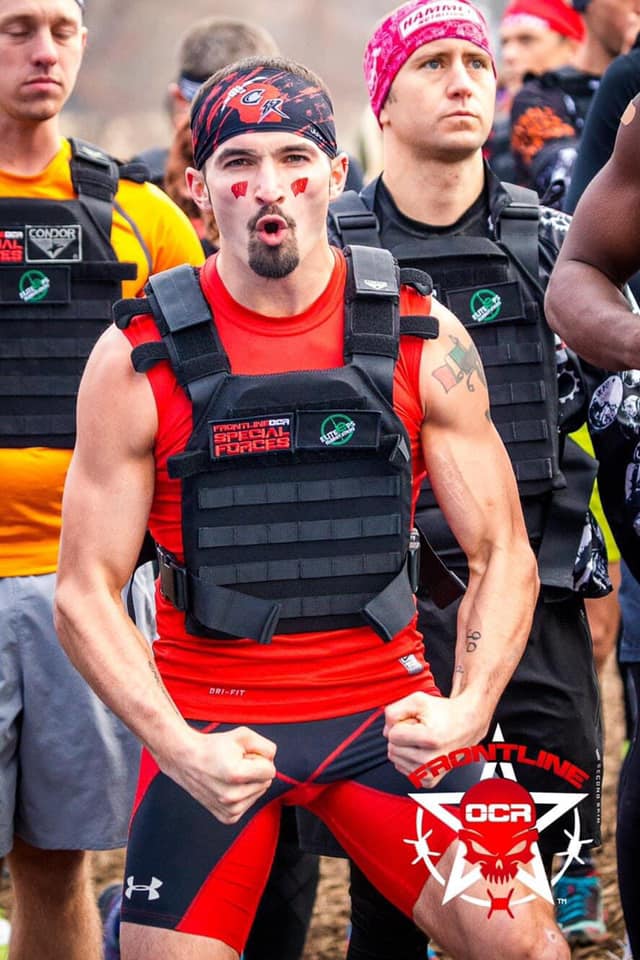
Skip the overpriced commercial vests—many use identical tactical carriers as their foundation before adding their branding markup. This method transforms a $50 plate carrier into a professional running vest in under 3 hours with simple modifications.
Quick Assembly Process
- Size your carrier: Put on the plate carrier and tighten all straps until it stays completely still when you jump vigorously
- Create plate templates: Lay the carrier flat on cardboard, trace both front and back panels, then cut out precise templates
- Build secure sleeves: Use zip ties (not duct tape) to attach weight plates to cardboard frames—6-8 zip ties per plate prevents dangerous shifting
- Install and test: Insert your secured plates, seal all Velcro, and perform the jump test to verify zero movement
Critical running adjustment: Position plates high on your chest and back—never let weight drop below your sternum. This keeps your center of gravity aligned with your natural running motion, preventing that forward lean that destroys form.
For most runners, starting with 10-15 pounds total (5-7.5 lbs per side) delivers noticeable strength benefits without compromising form. The entire project costs under $75 compared to $200+ for branded versions, and the military-grade materials withstand years of hard training.
Custom Sewn Vest for Perfect Fit
If you have basic sewing skills, a custom vest solves the fit issues that plague 90% of runners using off-the-shelf models—especially petite or athletic builds that fall outside standard sizing.
Fabric and Construction Essentials
Choose lightweight nylon packcloth for the best running performance—it’s water-resistant, durable, and adds minimal bulk. Measure three critical dimensions:
– Torso length (neck base to waist)
– Chest circumference at widest point
– Shoulder width across back
Cut front and back panels with 4 extra inches in width and 2 extra inches in length for seam allowances. Create 6-8 weight pockets (4″ x 5″ works perfectly for 2.5 lb sandbags), positioning them vertically along your spine—not horizontally across your chest—to minimize pendulum effect during stride.
Pro tip: Add 2-inch elastic side panels that expand with your breathing but snap back to maintain compression. This simple feature prevents the “ballooning” effect that causes most DIY vests to bounce during runs.
The secret to running-specific vests? Wide shoulder straps (minimum 3 inches) that distribute weight across your trapezius muscles instead of digging into delicate collarbones. For a 150-pound runner, start with 8-12 pounds of weight (5-8% of body weight) distributed equally front and back—never exceeding a 60/40 split.
No-Sew Emergency Solutions That Actually Work

When you need weighted running gear today, these household hacks deliver surprisingly effective results—though they’re temporary solutions until you build a proper vest.
Backpack Method Done Right
Most runners make the critical mistake of using standard backpacks without proper weight stabilization. Here’s the correct approach:
- Select a small, form-fitting daypack with both chest and waist straps
- Fill with tightly packed books or frozen water bottles (never loose items)
- Crucial step: Crumple towels around contents to eliminate all shifting
- Tighten straps until the pack barely moves during jumping jacks
- Never exceed 15 pounds—this method inherently creates uneven weight distribution
Warning: Avoid this method for runs longer than 3 miles. The top-heavy weight placement increases spinal compression forces by up to 25% compared to properly distributed vests.
Ankle Weight Conversion
Turn those dusty ankle weights into an effective torso-loading system:
- Connect 4-6 ankle weights (2-3 lbs each) using heavy-duty Velcro strips
- Form a continuous belt around your upper chest (not waist)
- Reinforce all connections with athletic tape before each run
- Position the top edge 2 inches below your collarbone
- Limit to 12 pounds maximum to avoid shoulder strain
This method works surprisingly well for short interval sessions but lacks the stability needed for sustained running. Use it only as a temporary solution while building your proper vest.
Weight Placement Rules Every Runner Must Follow

Improper weight distribution causes more running injuries than excessive weight itself. Follow these biomechanics-backed guidelines:
- Vertical positioning: Keep all weight between your sternum and lower ribcage—never let it drop toward your waist
- Front/back balance: Maintain equal weight distribution (50/50 is ideal, maximum 60/40 split)
- Side clearance: Leave at least 2 inches of space between weights and your armpits to prevent arm swing interference
Critical mistake to avoid: Placing weights too low creates a pendulum effect that increases impact forces on knees by up to 30%. Your vest should feel like an extension of your core, not a separate weight pulling you downward.
The Jump Test: Verify Zero Bounce Before Running
Never hit the pavement with a new weighted vest without this 30-second validation:
- Fully load your vest with target weight
- Jump in place 20 times with natural arm swing
- The vest must not shift more than 1 inch in any direction
- No weights should move within their pockets
- Your breathing must remain completely unrestricted
Red flag: If you see any fabric wrinkling or hear shifting weights during the test, your vest will bounce during running—go back and tighten straps or improve weight stabilization before proceeding.
Safety-First Weight Progression Plan
Most runners fail by adding weight too quickly. Follow this science-backed progression:
- Weeks 1-2: 5% body weight for 15-20 minute runs only
- Weeks 3-4: Increase to 7% body weight, maintain duration
- Week 5+: Add 1-2 pounds weekly, never exceeding 15% body weight
Stop immediately if you experience: Sharp shoulder pain (indicates poor weight distribution), lower back discomfort (too much weight too soon), or altered running form (leads to compensatory injuries).
Start Building Your Running Vest Today
The tactical carrier conversion delivers professional results in just 2-3 hours for under $75—beating commercial vests costing 3x more. If you have sewing skills, the custom vest provides perfect fit and longevity for serious runners.
Pro tip: Begin with the tactical carrier method this week. If you love the results after 4 weeks of training, invest time in a sewn vest for your exact specifications. Your future self will thank you when you’re running stronger with zero bounce—no expensive gear required.
Remember: Start conservatively with weight and duration. Your joints and running form will adapt within 4-6 weeks, delivering stronger legs, improved running economy, and the satisfaction of training smarter—not just harder. Now get building and transform your next run into a strength-building powerhouse session.


