
Your bodyweight squats have plateaued, but barbell squats leave you with aching shoulders and compressed spine. Weighted vest squats deliver the solution you’ve been missing—adding resistance without compromising form or joint health. This scientifically-backed approach distributes load across your torso rather than concentrating weight on your spine, creating superior muscle activation while reducing injury risk. By the end of this guide, you’ll know exactly how to select the right vest weight, perfect your form, and integrate this game-changing exercise into your routine for serious lower body development.
Weighted Vest Squats vs. Barbell: The Hidden Advantage

Barbell squats compress your spine under direct load, forcing your body to compensate while weighted vest squats distribute resistance across your entire torso. This fundamental difference creates a more natural movement pattern that actually improves your posture rather than compromising it. The vest’s centered weight placement demands greater core activation throughout the movement, turning every squat into a full-body stability challenge.
Research confirms this unique benefit—studies show weighted vest squats produce 15% more caloric burn than traditional squats while activating quadriceps, glutes, and hamstrings more effectively. Unlike barbells that shift your center of gravity backward, the vest’s balanced load keeps you centered over your mid-foot, allowing deeper, more powerful repetitions with less joint stress.
Why Your Muscles Work Harder With Vest Loading
The vest’s weight distribution creates constant tension through your entire range of motion, unlike barbells that become easier at the top of the movement. Your quadriceps fire harder during descent as they battle the added resistance through the full eccentric phase. Simultaneously, your glutes and hamstrings engage more intensely during ascent to overcome the vest’s downward pull.
This uniform resistance pattern explains why research documents up to 20% greater muscle activation in lower body musculature compared to unweighted squats. The vest essentially turns every repetition into a controlled strength-building opportunity from start to finish.
Your Weighted Vest Squat Form Checklist
Proper form separates effective training from wasted effort—or worse, injury. Follow this exact sequence to maximize results while protecting your joints.
Foot Position Setup for Optimal Power Transfer
Place your feet shoulder-width apart with toes turned out 15-30 degrees—this specific angle optimizes hip mobility while maintaining proper knee alignment. Press through your entire foot, focusing pressure on your mid-foot and heels rather than your toes. This foundation prevents forward lean and ensures proper force distribution through your lower body.
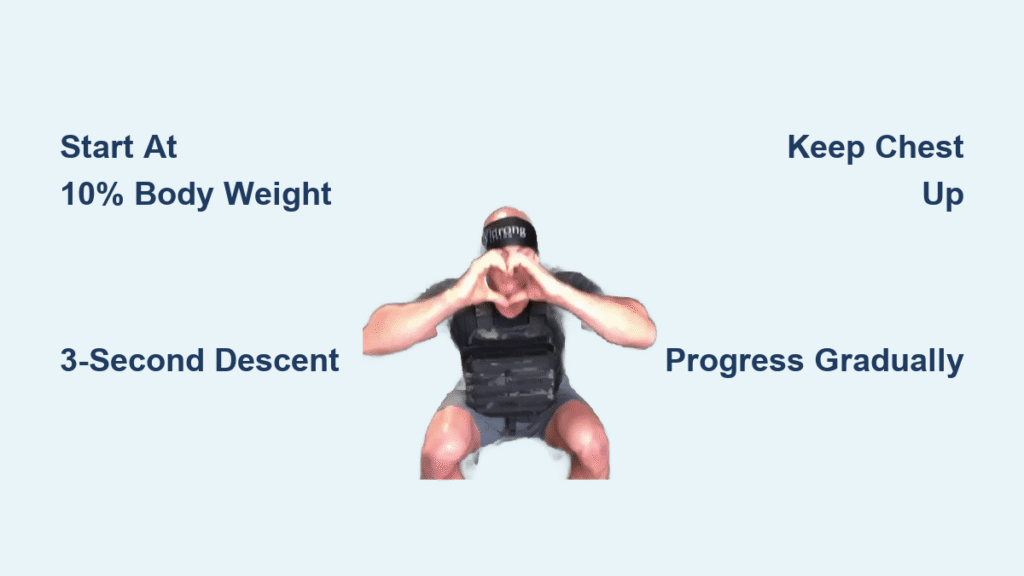
The 3-Second Descent Technique That Builds Strength
Lower yourself under control for a full 3 seconds while keeping your chest elevated and knees tracking over your second and third toes. The vest’s weight will naturally pull you forward—counteract this by engaging your core and imagining you’re sitting back into a chair. Aim for hip crease below knee level when your mobility allows, but never sacrifice form for depth.
Ascent Power Sequence to Maximize Glute Activation
Drive upward through your mid-foot and heels while forcefully exhaling. Focus on hip extension—squeezing your glutes at the top—rather than simply standing up. The vest’s resistance makes the concentric phase significantly harder, which is exactly where you’ll build the most muscle. Perform 8-12 repetitions per set with perfect form before considering additional weight.
Common Vest Squat Mistakes and Fixes
Forward lean: Strengthen your core with planks and practice hip hinge patterns without weight first.
Knee collapse: Focus on externally rotating your hips throughout the movement—imagine spreading the floor apart with your feet.
Shallow depth: Address ankle and hip mobility restrictions with daily dynamic stretching.
Breath holding: Practice diaphragmatic breathing during bodyweight squats before adding weight.
Smart Weight Selection: From Beginner to Advanced Loading

Choosing the right vest weight makes the difference between progress and plateaus—or injury.
Calculating Your Exact Starting Weight
Begin with 5-10% of your body weight for initial sessions—no more. A 180-pound person starts with just 9-18 pounds total vest weight. This conservative approach allows your body to adapt to the new movement demands while building proper neuromuscular patterns. Many beginners fail by starting too heavy, compromising form from day one.
The 6-Week Progressive Overload Plan That Works
Weeks 1-2: 3 sets of 10-12 reps at 10% body weight with perfect form
Weeks 3-4: 4 sets of 8-10 reps at 15% body weight, focusing on controlled descent
Weeks 5-6: 5 sets of 6-8 reps at 20% body weight, adding 1-second pause at bottom position
Increase weight only when you can complete all sets with flawless technique. Never jump more than 5% body weight per progression—this micro-loading strategy prevents plateaus while minimizing injury risk.
Equipment Selection: Finding Your Perfect Weighted Vest
Not all weighted vests deliver equal performance—choosing correctly impacts your results significantly.
Adjustable vs. Fixed Weight Vests: Which Suits Your Goals?
Fixed weight vests (10-40 lbs): Budget-friendly but limit progression—ideal only for beginners with short-term goals.
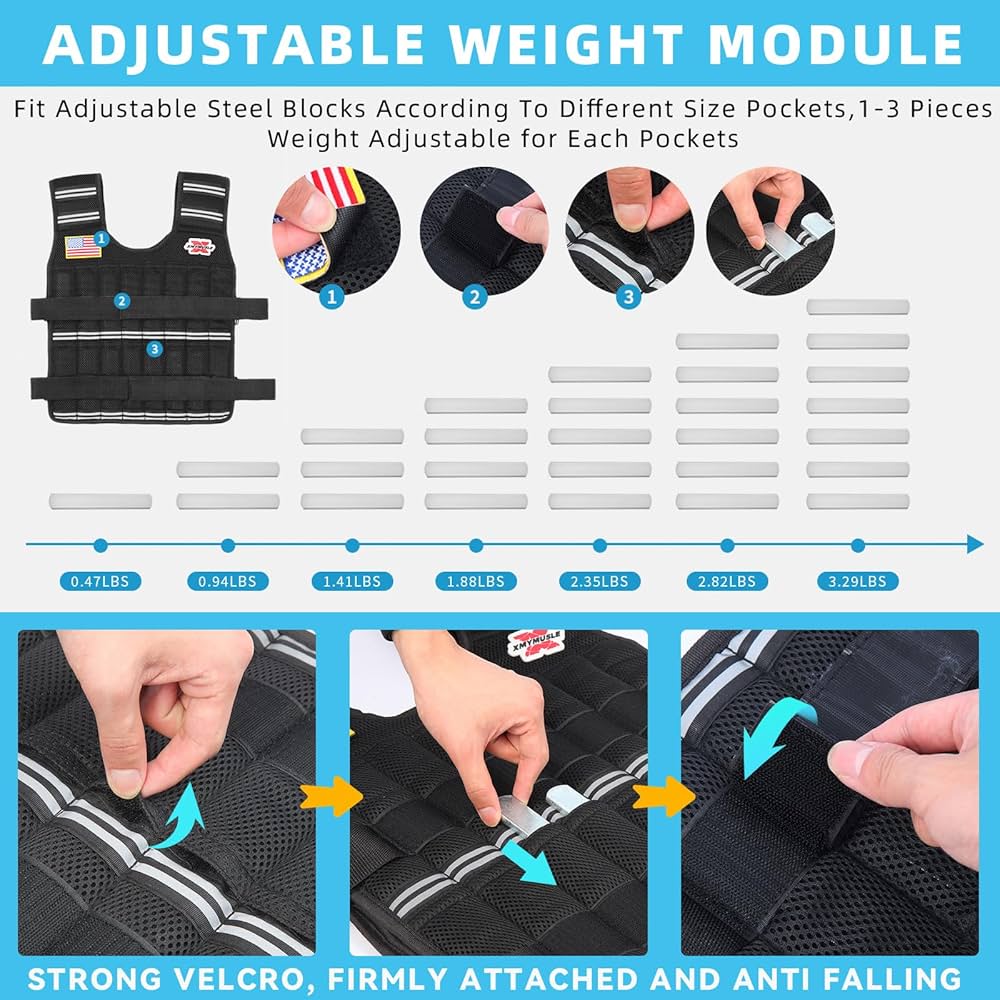
Adjustable systems (5-80+ lbs): Modular weight pockets allow precise 2.5-5 pound increments—essential for long-term progress.
Plate carriers: Military-grade durability but less comfortable for high-rep work—best for tactical training.
Invest in an adjustable vest with multiple weight pockets distributed evenly across front and back panels. This balanced design prevents shifting during movement and mimics natural weight distribution.
Critical Fit Measurements You’re Probably Missing
Measure your torso length from collarbone to navel—this determines proper vest length. Check chest circumference against sizing charts (quality vests accommodate 28-52 inch ranges). Ensure shoulder straps don’t restrict arm mobility—you should comfortably raise your arms overhead. The vest should fit snugly without restricting breathing or causing chafing during movement.
Injury Prevention: Safety Protocols for Long-Term Success
Protect your joints while maximizing results with these essential safety measures.
Must-Do Warm-Up Sequence Before Your First Rep
5 minutes of dynamic movement: leg swings (front/back and side-to-side), hip circles, bodyweight squats
Activation sequence: 15-20 bodyweight squats focusing on perfect form pattern
Progressive loading: Start with 50% of your intended working weight for first set
Skipping this warm-up sequence dramatically increases injury risk, especially when adding external resistance to foundational movements.
Programming Weighted Vest Squats for Real Results
Integrate vest squats strategically for maximum impact on your lower body development.
Integrating Vest Squats Into Your Current Routine
Beginners: Replace traditional squats 2x weekly with 48-72 hours recovery between sessions
Intermediate: Substitute for barbell squats during deload weeks or add as finisher after leg day
Advanced: Use 3x weekly with varied intensities—combine with jump squats for power development
Weighted vest squats excel when travel limits equipment access or during rehabilitation phases where spinal loading needs reduction.
3 Advanced Variations to Break Plateaus
Tempo Squats: 4-second descent, 1-second pause, 2-second explosive ascent
Bulgarian Split Squats: Rear foot elevated on bench while wearing vest for unilateral strength
Weighted Jump Squats: Add explosive power development with 10-20% body weight
These variations prevent adaptation while building functional strength that transfers to athletic performance and daily activities.
Special Applications: Beyond Basic Strength Gains
Weighted vest squats deliver benefits most lifters never consider.
Weighted Vest Squats for Bone Density and Aging Populations
Research confirms weight-bearing exercises like vest squats maintain bone mineral density, reducing osteoporosis risk by up to 30% when performed consistently. Older adults should focus on functional movement patterns with 5-10% body weight, emphasizing chair-based variations for safety while building strength for daily activities.
Athletic Performance Enhancements You’re Not Using
Sprinters and jumpers gain explosive power through contrast training—alternating between weighted and unweighted squats. The vest’s resistance improves force production during the concentric phase, directly translating to faster acceleration and higher vertical jumps. Incorporate weighted vest squats 2x weekly during off-season training for maximum carryover to sport performance.
Final Note: Weighted vest squats offer a joint-friendly path to serious lower body strength when programmed correctly. Start conservatively at 10% body weight, prioritize perfect form over added resistance, and progress gradually using the 6-week plan outlined here. The vest’s unique loading pattern builds functional strength that transfers directly to athletic performance while supporting long-term joint health—making it one of the most efficient lower body exercises you can perform with minimal equipment. Track your progress monthly and adjust your programming based on performance metrics to ensure continuous improvement.


